With the 8LTS release TYPO3 got rid of its old and dusty Rich Text Editor (RTE) known as "rtehtmlarea" and introduced the CKEditor, a much more versatile and modern solution for RTE editing in the backend. With this change the configuration and integration of any RTE customization changed drastically. In this article we take a closer look on the basic configuration and integration. We will also see how to add link classes to the link Wizard as this is a feature that many TYPO3 installations are using. Finally we'll have a look on the extendability of the CKEditor and on how to integrate plugins.
Basic Configuration and Integration
First of all, the CKEditor is not configured in PageTSConfig anymore. Following the standardization philosophy of the TYPO3 core the data serialization language YAML is used for configuration instead. TYPO3 ships three default configuration: minimal, default and full. To add a new configuration we have to register our YAML file in the ext_localconf.php of any extension:
$GLOBALS['TYPO3_CONF_VARS']['RTE']['Presets']['myConfig'] = 'EXT:my_ext/Configuration/RTE/MyConfig.yaml';We've chosen the name myConfig for our configuration. Next we have to tell TYPO3 where to use myConfig. It is possible to assign a different configuration to different fields and different records. For example you could write an entirely different RTE configuration and only apply that configuration e.g. to the description field of news records. We tell TYPO3 which configuration to apply on which field in our PageTSConfig:
RTE {
    default.preset = default
    config {
        tt_content.bodytext {
            preset = full
            types.text.preset = minimal
        }
        tx_news_domain_model_news.bodytext.preset = myConfig
    }
}
With this integration all RTEs will use the default configuration except for the bodytext field of the tt_content table wich would use the full configuration and the bodytext field of news records will use our custom configuration that we named myConfig. It is also possible to change the applied configuration of a field based on the current selected type of the record. So in this example we apply the minimal configuration for the text content element although it also uses the bodytext field of tt_content.
So let's have a look at an actual YAML file to see how the configuration looks like. This is the Default.yaml that ships with the core:
# Load default processing options
imports:
    - { resource: "EXT:rte_ckeditor/Configuration/RTE/Processing.yaml" }
    - { resource: "EXT:rte_ckeditor/Configuration/RTE/Editor/Base.yaml" }
    - { resource: "EXT:rte_ckeditor/Configuration/RTE/Editor/Plugins.yaml" }

# Add configuration for the editor
# For complete documentation see http://docs.ckeditor.com/#!/api/CKEDITOR.config
editor:
  config:

    format_tags: "p;h1;h2;h3;h4;h5;pre"

    toolbarGroups:
      - { name: styles, groups: [ styles, format ] }
      - { name: basicstyles, groups: [ basicstyles ] }
      - { name: paragraph, groups: [ list, indent, blocks, align ] }
      - { name: links, groups: [ links ] }
      - { name: clipboard, groups: [ clipboard, cleanup, undo ] }
      - { name: editing, groups: [ spellchecker ] }
      - { name: insert, groups: [ insert ] }
      - { name: tools, groups: [ table, specialchar ] }
      - { name: document, groups: [ mode ] }

    justifyClasses:
      - text-left
      - text-center
      - text-right
      - text-justify

    extraPlugins:
      - justify

    removePlugins:
      - image

    removeButtons:
      - Anchor
      - Underline
      - Strike
      - Styles
First thing we notice is the imports section. This allows us to split our configurations in smaller pieces and reuse them in several RTE configuration sets.
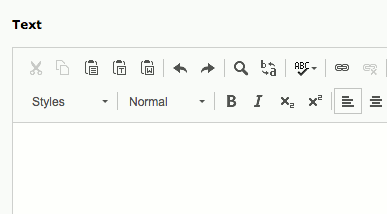
Within editor we find the config section where we can configure everything the CKEditor is capable of. Which is a lot. Let's see how this configuration looks like if applied to a field:

The layout of the Toolbars is configured under toolbarGroups. In this example all toolbar icons are rendered in one line but we can also add a line break in the toolbar with '/'. Within format_tags we determine which tags should be available in the Format dropdown.
justifyClasses tells the CKEditor which CSS classes to apply for "left", "center", "right" and "justified" text. Also the justify plugin is enabled and the image plugin is disabled because we do not want images to be inserted in RTE content but rather have clean relations to our assets. Finally a few buttons are removed from the editor altogether.
All available configuration options can be found in the documentation of the CKEditor.
To recap we can now watch Mattes and Benji explain everything again in this YouTube Video:
Adding custom Link Classes
Most RTE configurations are not complete without custom classes that can be applied to links. With the CKEditor we now have two ways to add them:
1. With the stylesSet configuration:
If we include the styles dropdown in our toolbarGroups, we can determine in the stylesSet section what options should be available (note that in the default.yaml example above the styles dropdown was explicitly removed from the toolbar). We can even be more specific and allow some styles only on certain tags. This will be clear with a short example:
editor:
  config:
    stylesSet:
      - { name: 'External Link', element: 'a', attributes: { class: 'external-link' } }
      - { name: 'Code block', element: 'code' }
Now we can create a link or move the mouse cursor to an existing link and then apply our class external-link with the style dropdown. The option "External Link" will not appear on normal text because we only enabled it for a tags. This is the quickest way to add link classes (and any other attribute to any other tag) to the RTE.
But with this configuration the class won't show up in the link wizard, where we might want it as well. For this we need to go for the 2nd way to add link classes:
2. With the buttons and classes configuration:
buttons:
  link:
    url:
      properties:
        class:
          default: 'external-link'
    properties:
      class:
        allowedClasses: 'external-link'

classes:
  external-link:
    name: 'External Link'

classesAnchor:
  externalLink:
    class: 'external-link'
    type: 'url'
    target: '_blank'
This configuration is very similar to the old RTE PageTSConfig. In the buttons section we allow the class "external-link" and set it as default to External URLs (url). We assign a label to it in the classes section and finally we make it only appear in the External URL tab in the (optional) classesAnchor section. This configuration can of course be extended with more classes and will result in the link classes being available in the link wizard:

We can put this configuration in a separate YAML file (e.g. ButtonClasses.yaml) and include that file in our configuration. Also note that we need to include a custom CSS file to style our classes in the CKEditor so that we have a live preview of what the link would look like. So we add to our default configuration the following lines:
imports:
    # other imports go here
    - { resource: 'EXT:my_ext/Configuration/RTE/ButtonClasses.yaml' }

editor:
  config:
    contentsCss:
      - 'EXT:rte_ckeditor/Resources/Public/Css/contents.css'
      - 'EXT:my_ext/Resources/Public/Css/rte.css'
And that's it. We now can add button classes to our CKEditor to make the editors happy. Only one gem is missing from the CKEditor feature set: Plugins.
External Plugins
One of the great things of the CKEditor is its extendability and the wide variety of plugins that are available on ckeditor.com. Let's take the YouTube Plugin as an example for the integration. We have to download the plugin and then tell the CKEditor where to find it:
editor:
  externalPlugins:
    youtube: { resource: "EXT:mx_ext/Resources/Public/RTE/Plugins/youtube/plugin.js" }
And for some plugins that's it.
For the YouTube Plugin we need to allow the iframe tag, because embedded YouTube videos are iframes. There is also a configuration option to set the default width of an iframe created by this plugin. The editor can change the width for each video individually. So let's add the missing pieces:
editor:
  config:
    youtube_width: '550'

    extraAllowedContent: '*(*)[data-*]; iframe'
We use extraAllowedContent here for allowing iframes. Dont worry about the *(*)[data-*]; stuff. That is copied from the Base.yaml of the core because we would override it otherwise. It allows classes and data-attributes on all elements. The documentation of the YouTube Plugin states that we should set allowedContent: true to enable iframes but I would advice against it because it would basically disable the Advanced Content Filter (ACF) and allow everything and that is not what we want at all (see e.g. in the CKEditor Best Practices).
After this we should see the YouTube button in the toolbar and be able to use this handy Plugin.
I don't actually use this plugin to add YouTube Videos, as TYPO3 can handle those with FAL wich I prefer. The YouTube plugin was rather used as an example on how to integrate a plugin in general.
The only thing left to say is: thanks for reading! I am available by email and also on twitter and slack for questions and feedback.
Enjoy the power of CKEditor in TYPO3!

Further Information
- rte_ckeditor, Official Documentation
- Blog Post Configure CKEditor in TYPO3, by Markus Schwemmer (2017)
- Blog Post Extend CKEditor in TYPO3 with Add-Ons, by Markus Schwemmer (2017)
- Blog Post TYPO3 8.x ckeditor konfigurieren, by Thomas Kieslich (2017, german)
- Blog Post Links im CKEditor mit eigenen CSS Klassen, by Thomas Kieslich (2017, german)
- Slides for the talk TYPO3 create a CKEditor plugin, by Frans Saris (2017)